Spaceship Text One Line 1 Line Text Art Bullet
Troubleshooting
Indenting First Bullet Indents All Bullets
The Increase Indent and Subtract Indent buttons on the Formatting toolbar do not piece of work consistently with the start bullet in a certificate.
This problem occurs whenever you endeavor and change the indentation level of the first bullet in a certificate.
This is applicable to both bulleted and numbered bulleted lists.
Press (File > New) to create a new document and blazon four lines of text.
Highlight all the lines and press the Bullets button.
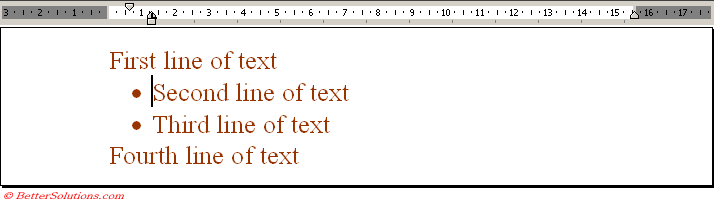
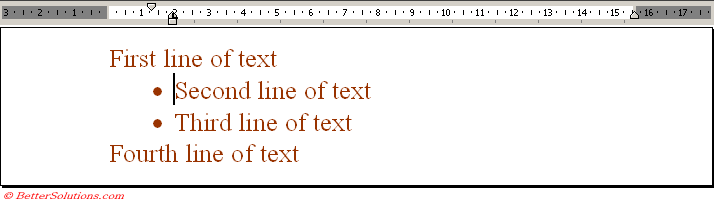
Position the cursor at the starting time of the first bullet and printing the Increase Indent button.
You volition detect that the indentation of all the bullets is increased. (all the bullets or merely the 3rd line ?)
This problem will occur whenever you lot try and change the indentation level of the first bullet in your document.
Information technology doesn't thing if you merely put the cursor somewhere in the get-go bullet or you highlight the unabridged bullet indicate. Endeavour It.
It doesn't matter if at that place is text before the bullets or how many bullets you have. Try It.
If you lot desire to indent only the first bullet point you wont be able to.
Feature or Bug
You might exist thinking that this is a overnice feature to have. If you want to indent all the bullets points yous can exercise so by putting the cursor into the first bullet.
This only works with the get-go block of bullets in a certificate though
Enter a paragraph return and add some more bullets
You will notice that it doesn't happen for subsequent bullets in the document.
You may find some really annoying behaviour when you use the following buttons on the Formatting toolbar.
Press (File > New) and create a new blank certificate.
Display the Paragraph Marks so you can see all the formatting.
All these examples use the standard Normal.dot template and the default bullets and numbers.
They all start with the following text at the elevation of the folio.
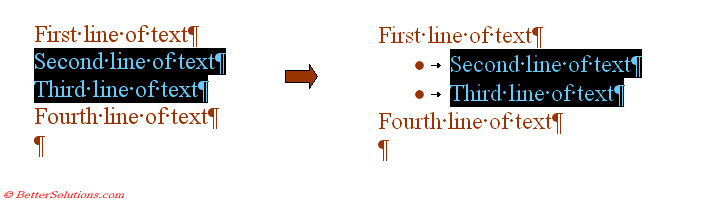
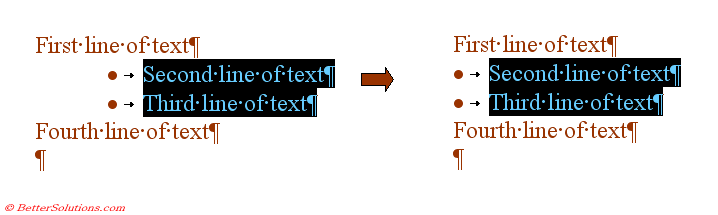
Highlight the second and 3rd lines and press the Bullets push button.
1) Unable to Indent the Kickoff Line
This existed in Discussion 2003.
Position the cursor at the beginning of the second line and press the Increase Indent button.
The third line also gets indented. In fact all the bullet points in the block will have their indentation increased.
That is a bit annoying just it gets worse. In fact completely different blocks besides get indented.
ii) Inconsistent when Decreasing the Indentation of a line
This existed in Word 2003.
Printing the Decrease Indent button.
Both the lines accept their indentation changed and worse than that they have all their indentation removed.
The bullets were actually on level two. They should have been reduced to level 1.
It seems that if the lines of text have been indented to level ii, four, half-dozen or viii then pressing the Subtract Indent push button will actually decrease the indentation past 2 levels instead of one.
3) Bullet points simply change when there are different levels
This existed in Word 2003.
Change all the lines of text dorsum to the Normal mode.
Highlight the second and third lines and press the Bullets button on the Formatting toolbar
Position the cursor at the start of the 3rd line
Printing the Increment Indent button on the Formatting toolbar
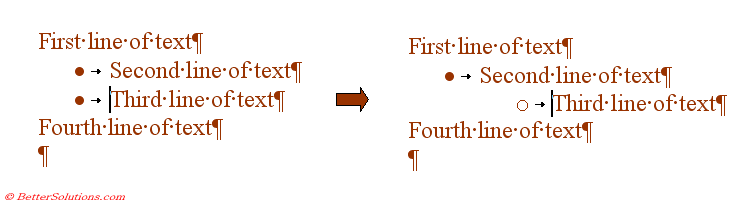
The bullet alter changes to something unlike ?
4) Dissimilar blocks get indented
This existed in Word 2003.
Remove all the bullet points by pressing (Ctrl + "A") and selecting the Normal fashion.
Move to the finish of the third line and press Enter.
Place the insertion point in the second line and add bullets by pressing the Bullets push button.
Place the insertion signal in the third line and add together bullets by pressing the Bullets push button.
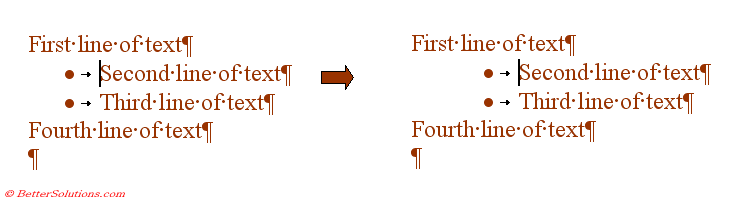
Place the cursor at the start of the second line and press the Increment Indent push.
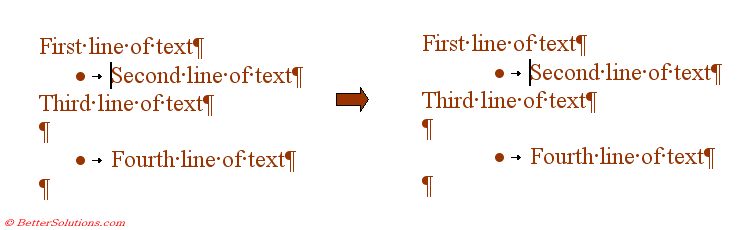
The 4th line also gets indented even though it is in a completely dissimilar block.
5) Bullet point next to frame or textbox
This was introduced in 2007
Create a new bare document
Increase the left margin to 7cm
Insert a textbox
Type the following text adjacent to it and apply the bullet style
SS
Select the textbox and convert it to a frame.
Format Textbox, Text Box tab
Press Convert to Frame
The hanging indent on the paragraph gets ignored.
SS
When I make changes to the bullets or numbers in a listing, not all the bullets or numbers change.
When y'all click a bullet or number in a listing, all the items on that level of the list are selected. The bullet or number clicked is highlighted in nighttime grayness, while the balance of the bullets or numbers in the list at that level are highlighted in light grayness.
A bullet or number on the aforementioned level that is not highlighted is not a part of the list, even if it otherwise looks every bit though it is. Changes you brand to the bullets or numbering in the rest of the list at that level will non affect the bullet or number that is non highlighted.
To make the bullet or number a part of the list, do the following:
Place the insertion point into the text beside the bullet or number that is non highlighted, and then click Bullets or Numbering on the Formatting toolbar (toolbar: A bar with buttons and options that you use to bear out commands. To display a toolbar, apply the Customize dialog box (point to Toolbars on the View bill of fare and click Customize). To see more buttons, click Toolbar Options at the end of the toolbar.). The bullet or number should at present be highlighted.
Select the unabridged list, click Bullets or Numbering , and and then click Bullets or Numbering once more.
Bullet characters show every bit clock faces or empty boxes.
Bullets announced as clock faces Unless yous've selected a unlike font for the bullet, Microsoft Discussion uses the bullet character from the Symbol font. If the Symbol font is damaged or unavailable, Word substitutes the Wingdings font. In this font, the respective ASCII graphic symbol is a clock confront. Try reinstalling the Symbol font, or use the Bullets and Numbering command on the Format menu to select a different bullet character from the Wingdings font.
Bullets appear equally empty boxes When you create a bulleted list using the Marlett font, instead of inserting a unmarried bullet, Discussion either inserts at least one box or inserts a bullet and a box character. To use a bullet grapheme from the Marlett typeface, click Symbol (Insert menu), select the symbol you want, and and then click Insert. You lot may need to adjust the text indentations. You can also use a different font to insert a bullet.
Every line is bulleted or numbered instead of merely the starting time line.
To add together text beneath a bulleted or numbered item in a list without adding a bullet or number, place the insertion point at the end of the list item and press SHIFT+ENTER. The new line indents and aligns with the text in the previous line. Add together text, so press SHIFT+ENTER over again to create another indented line, or printing ENTER to create some other numbered or bulleted line.
I want to utilise different formats for the text and the bullets or numbers in my list items.
Y'all tin can have assuming bullets or numbers and plain text, or vice versa. To change the formatting of the bullets or numbers, click a bullet or number in the list, and and so click a button the Formatting toolbar (toolbar: A bar with buttons and options that you use to carry out commands. To brandish a toolbar, use the Customize dialog box (signal to Toolbars on the View menu and click Customize). To see more than buttons, click Toolbar Options at the end of the toolbar.) to make changes.
Custom tab characters disappear when I add or remove bullets.
When you add together bullets to or remove them from lines of text that comprise custom tab stops and tab characters, Microsoft Give-and-take removes the tab characters and retains the tab stops.
Do one of the following:
Click where yous want the tab character to appear, and press the TAB key to reinsert the tab graphic symbol.
Avoid adding or removing bullets from items that contain custom tab stops and tab characters.
Note Creating a custom tab is a two-pace process. First you lot set the tab end, and and then you printing the TAB key to insert the tab grapheme.
Paragraph indents disappear when I add or remove bullets or numbering.
When you lot do any of the following, Microsoft Discussion removes existing indents from paragraph text:
Add together bullets to indented and numbered paragraphs.
Add numbering to indented and bulleted paragraphs.
Remove bullets from indented and bulleted paragraphs.
Remove numbering from indented and numbered paragraphs.
Later on you utilize the bullet or numbering format, you must insert the indents into the paragraph.
The custom formatting changes I fabricated to my lists have disappeared.
The list formats that appear on the Bulleted and Numbered tabs when you lot click Bullets and Numbering on the Format carte du jour are based on built-in Listing Bullet and List Number styles (style: A combination of formatting characteristics, such as font, font size, and indentation, that yous proper name and store every bit a set. When you employ a style, all of the formatting instructions in that style are applied at one time.). If you create a custom style based on these built-in styles, you might lose the custom formatting when you copy styles between documents or when you restart Microsoft Word.
Modify the custom numbering style in the new document If y'all re-create a custom numbering fashion from one document to some other document, the numbers might disappear. In the new document, you tin can modify the custom style to include list numbers.
Create a custom bullet or numbering fashion that is not based on built-in listing styles You may notice your custom changes missing afterwards you close the document and restart Word. To go on the formatting changes you make, you should create a new style that is non based on one of the congenital-in or base styles (base manner: The underlying or original manner on which other styles in a document are dependent. When yous change a formatting element of the base style in a document, all other styles that originate from the base style will also reflect the change.). In the Styles and Formatting task pane (chore pane: A window within an Part application that provides commonly used commands. Its location and small size let you to employ these commands while still working on your files.), click New Way. In the Proper noun box, type a unique name, and so click (no mode) in the Based on box.
Create a new template that contains the custom bullet or numbering manner To save a custom bulleted list or numbered list format for reuse, you can modify the List Bullet or List Number fashion to use the bulleted list or numbered list format you desire. Open up the template (template: A file or files that contain the structure and tools for shaping such elements equally the style and page layout of finished files. For example, Discussion templates can shape a single document, and FrontPage templates tin can shape an entire Web site.) yous apply to create your documents, change the manner in the new template, and then salvage the template. New documents you base on the template will take the updated list style. Apply the style to paragraphs you lot want bulleted or numbered. Learn about modifying styles.
Outline numbering is on, but my headings aren't existence numbered.
Make sure you lot've formatted the headings with the born heading styles (heading style: Formatting applied to a heading. Microsoft Word has ix different congenital-in styles: Heading 1 through Heading 9.). If the headings in your document are formatted with custom styles, y'all must link each custom style with an outline numbering level.
© 2022 Better Solutions Limited. All Rights Reserved. © 2022 Better Solutions Limited Meridian PrevNext
Post a Comment for "Spaceship Text One Line 1 Line Text Art Bullet"